AI Threat Hunting Lab: Week 2 - Network Deep Dive
Welcome back to the AI Threat Hunting Lab build! As promised in last week’s update, this post is a technical deep dive into the core components, configurations, and software used to get the network backbone online.
If you’re looking to replicate this setup, this post will serve as your guide.
Part 1: The Software Stack (The ISOs)
First, let’s cover the “building blocks.” All components are running as virtual machines, and the first step was to download the necessary ISO files.
-
pfSense (Firewall/Router): This is the heart of our network, managing all routing, segmentation, and firewall rules.
- Download: https://www.pfsense.org/download/
- Kali Linux (Attacker): Our dedicated offensive machine.
-
Ubuntu Desktop (Client): Our “victim” or standard user endpoint.
- Download: https://ubuntu.com/download/desktop
-
Splunk Free (SIEM): The core of our visibility and monitoring. We are using the free license.
- Download: Splunk Free Download Page
Part 2: pfSense Configuration Deep Dive
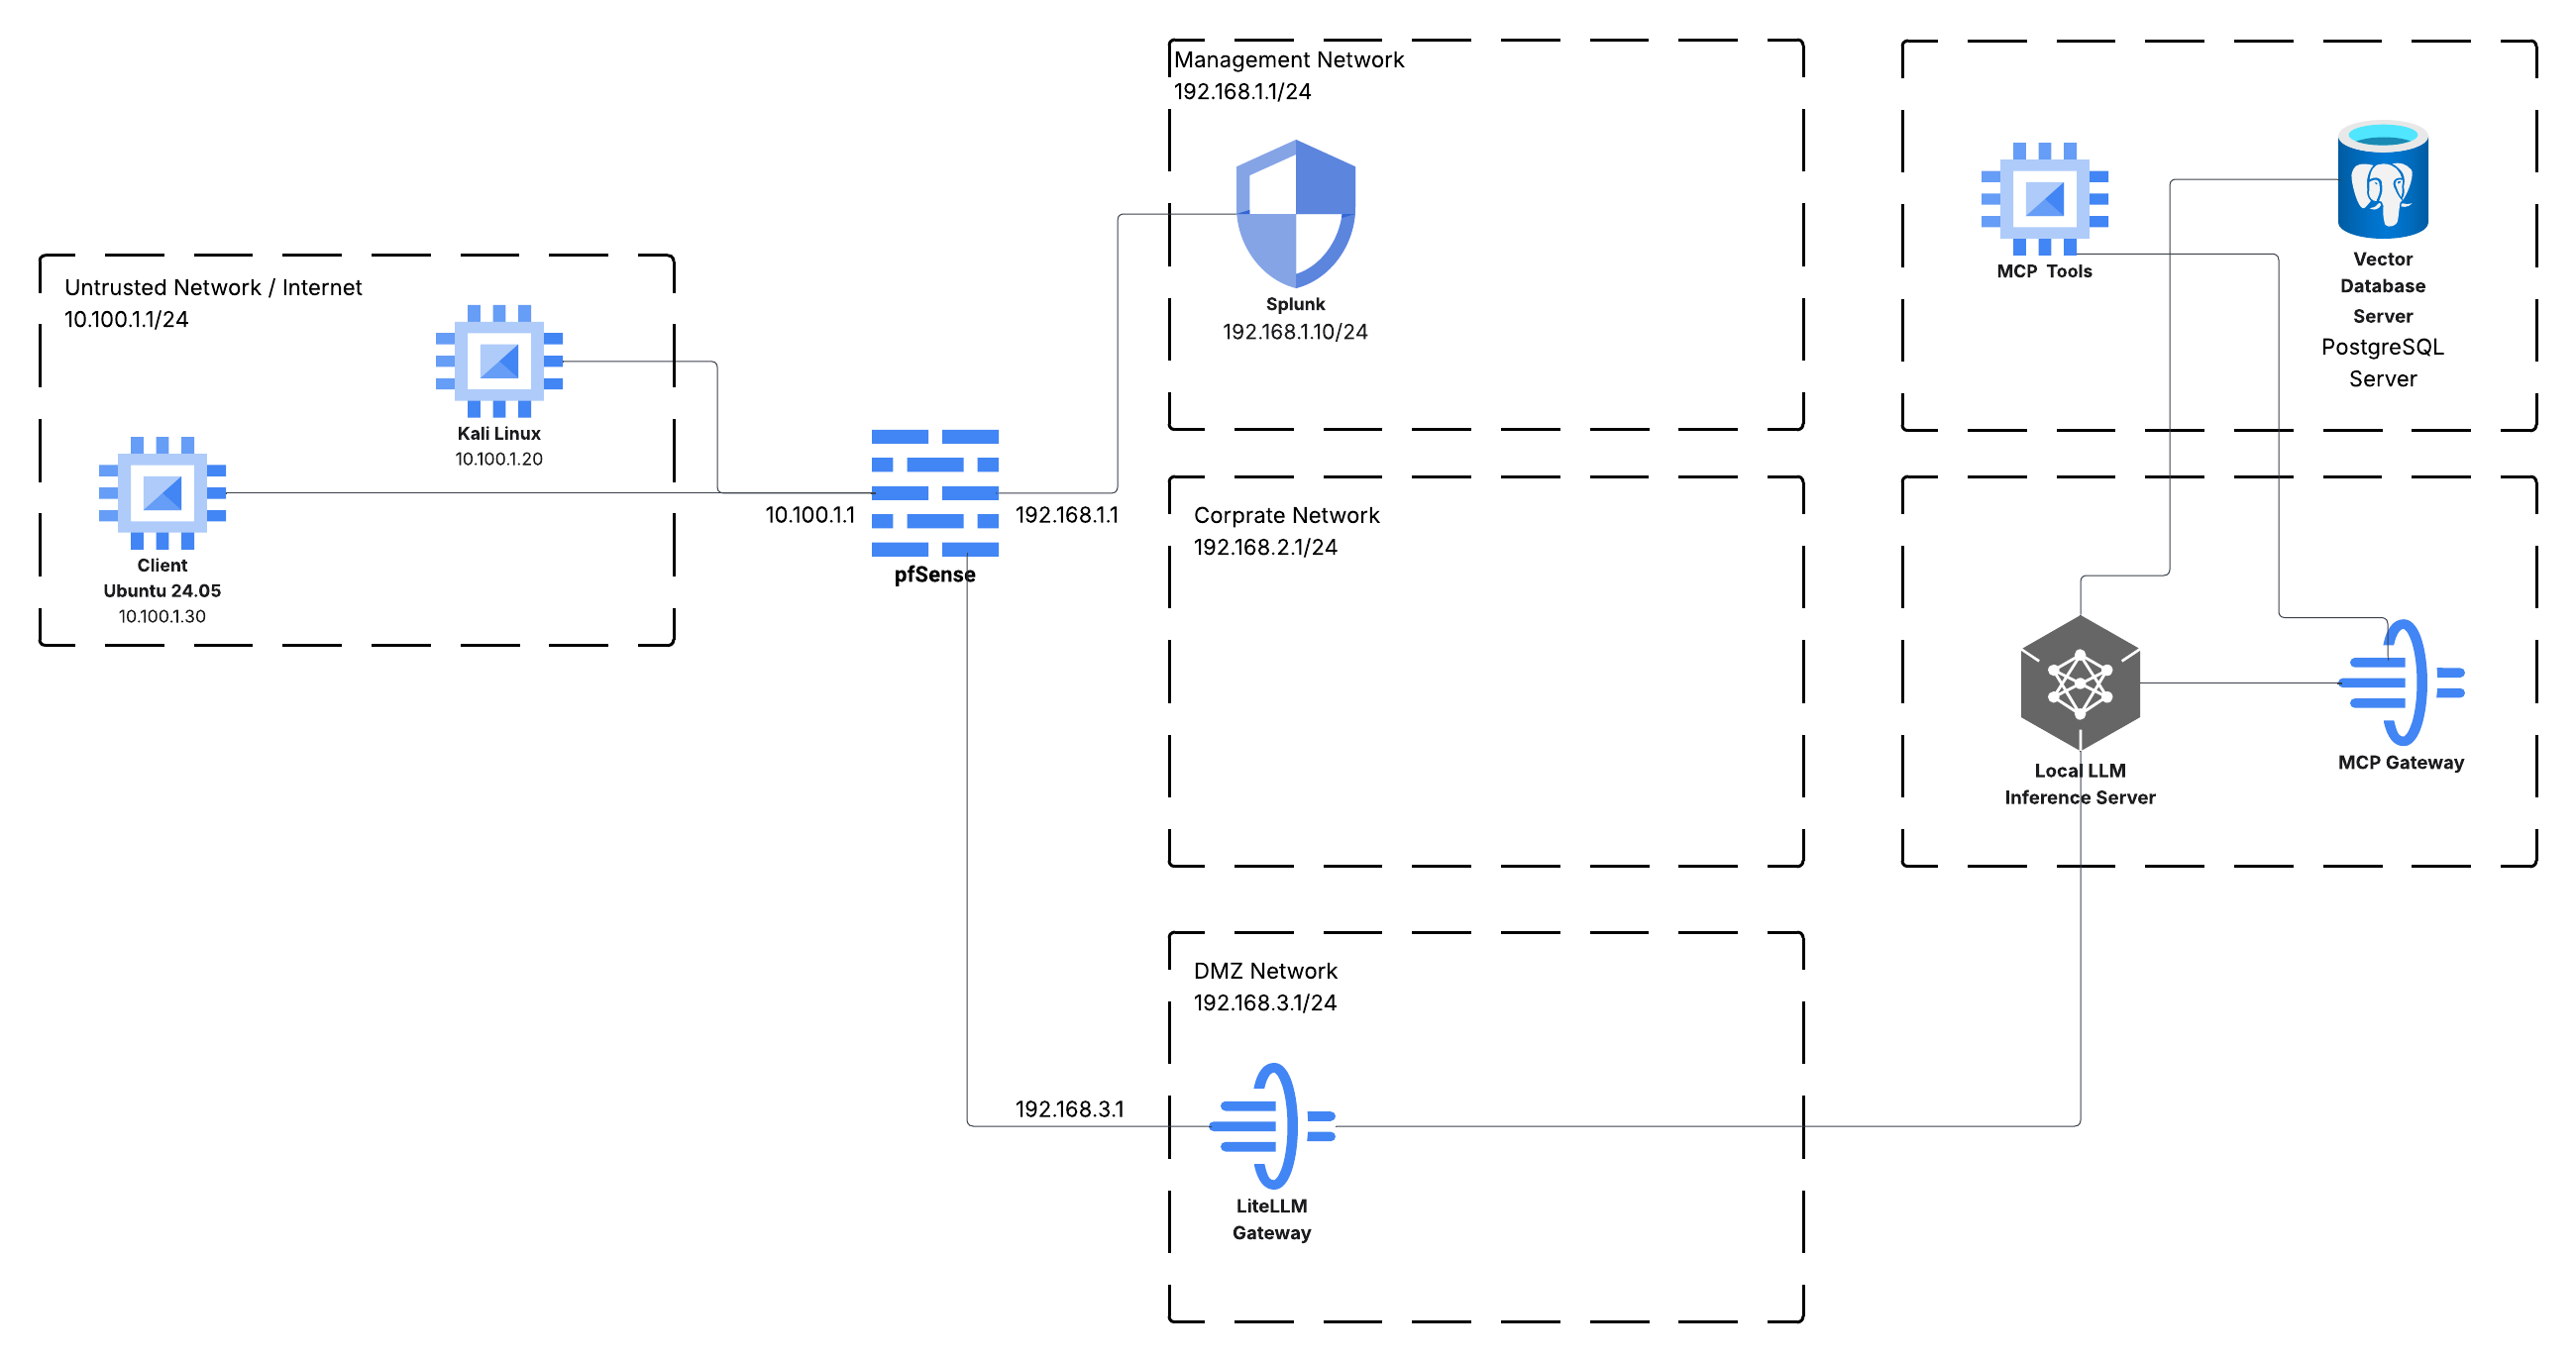
Getting pfSense configured correctly is the most critical part of this foundation. As shown in last week’s diagram, we have a Management (MGMT) network (192.168.1.1/24) and an Corporate Network (Corp) network (192.168.2.1/24). I also created a DMZ network for AI services.
Here are the exact configurations from my lab setup.
Interface Configuration
Here is the breakdown of the virtual interfaces assigned in pfSense.

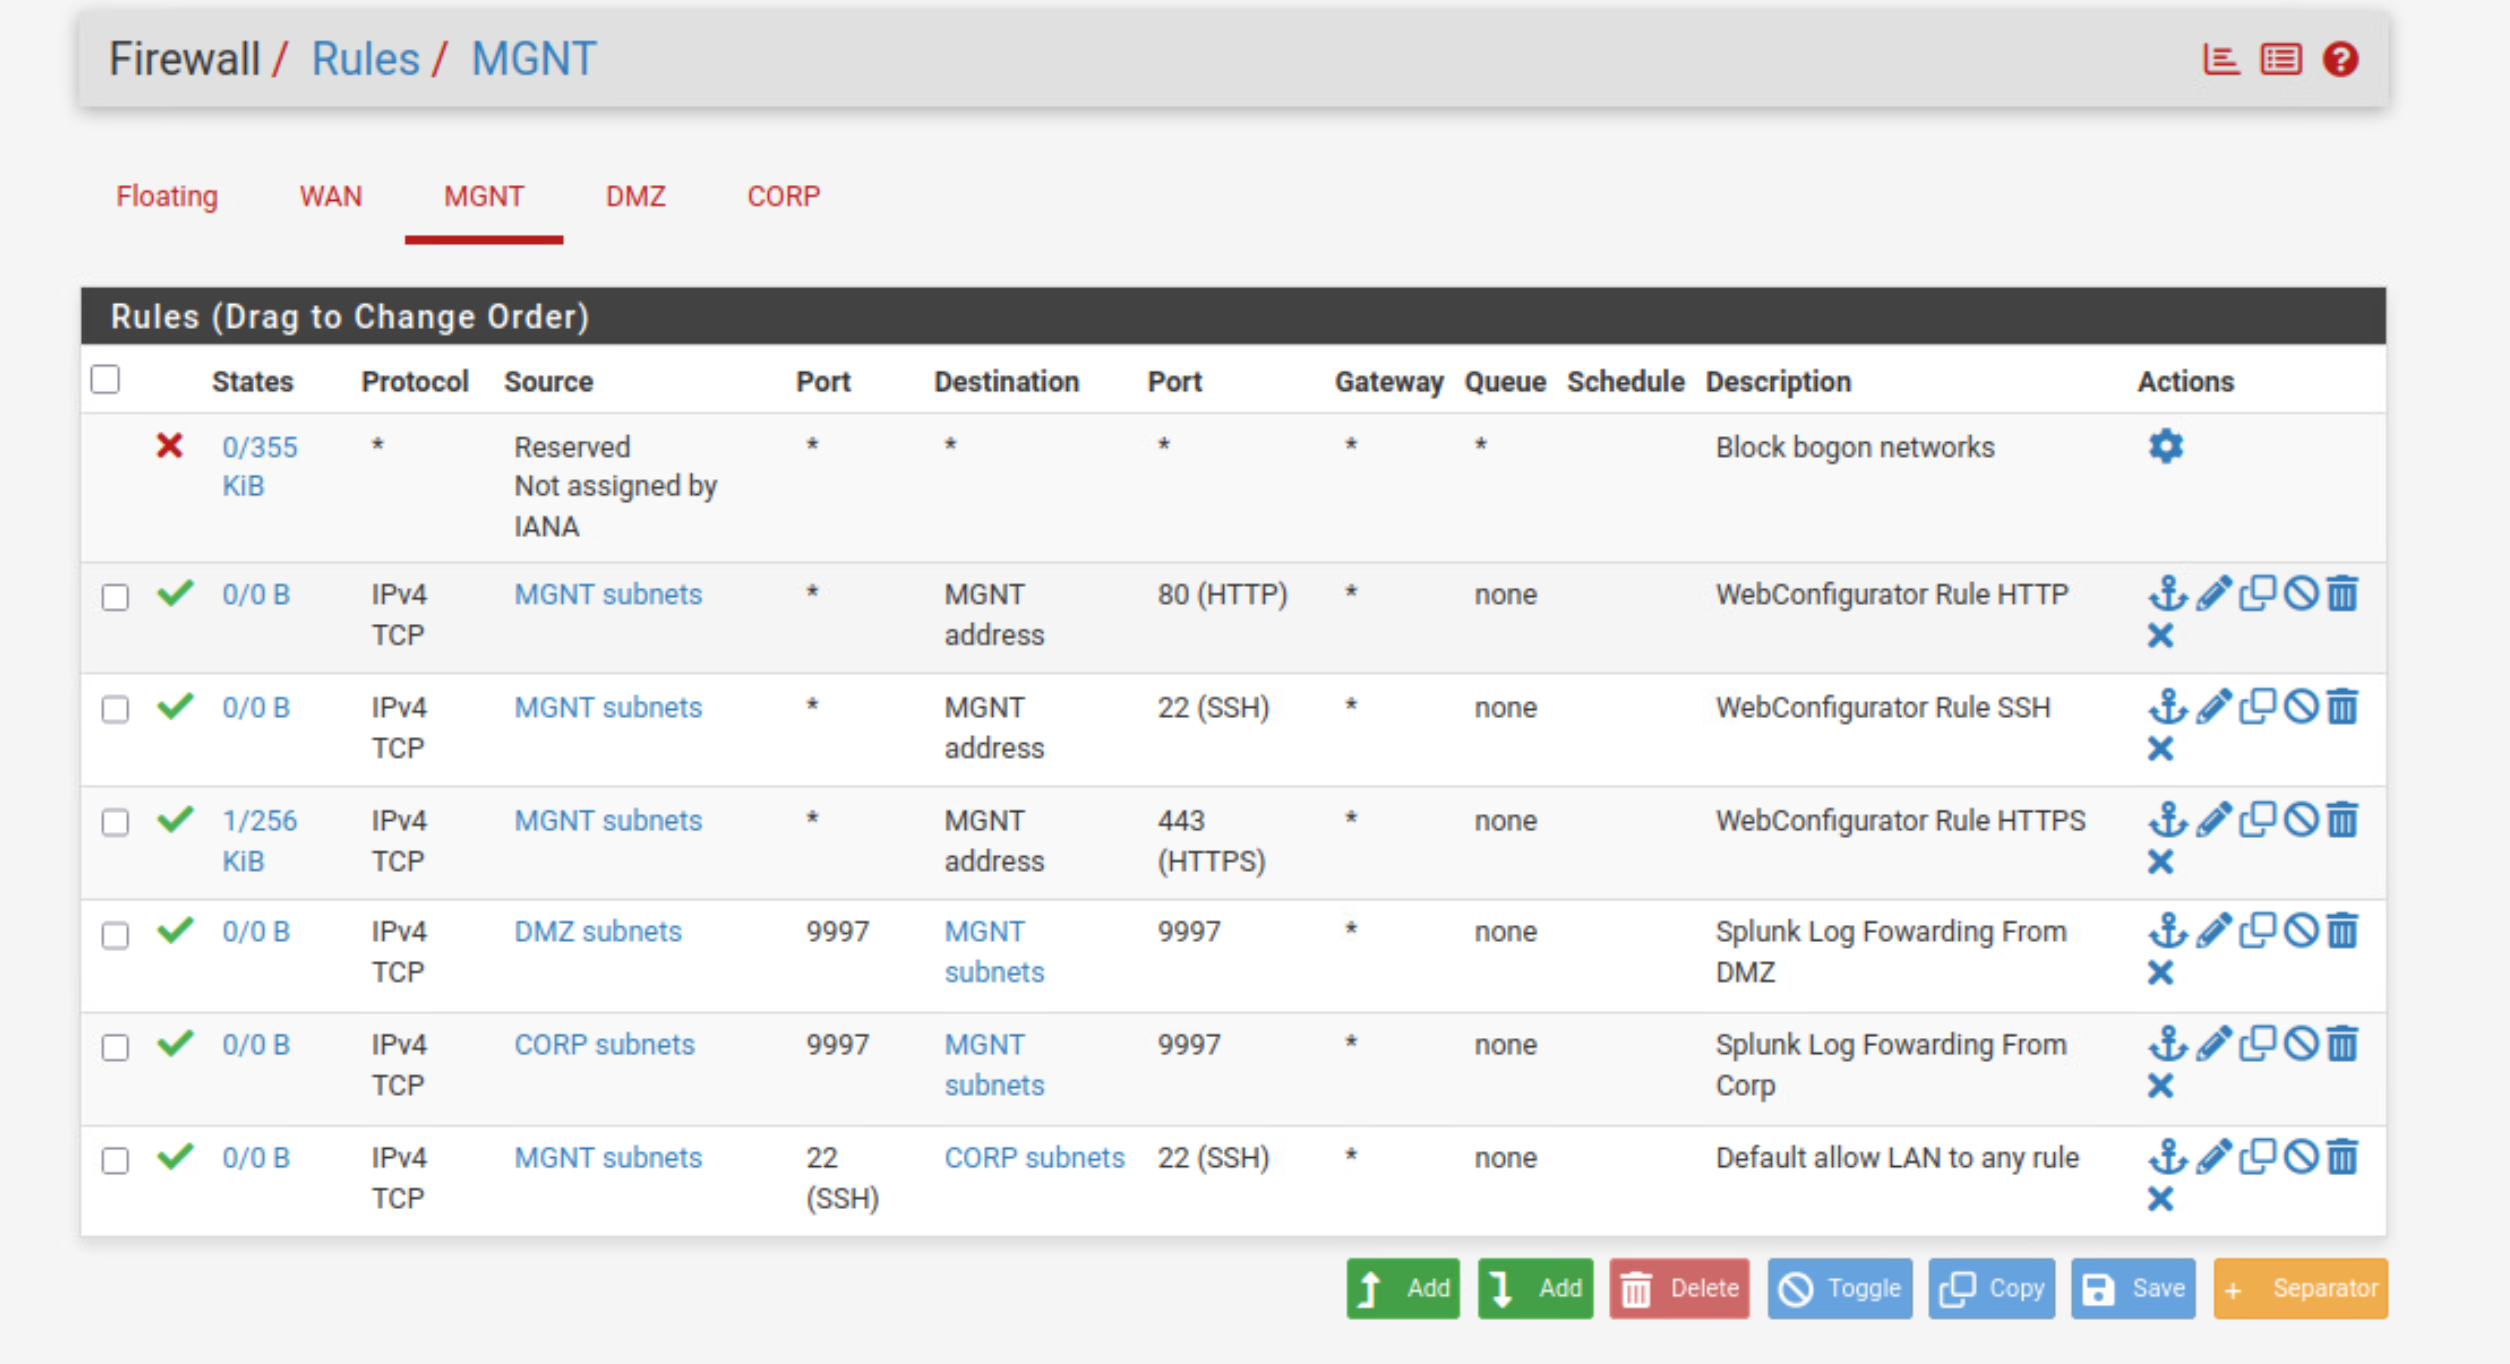
Firewall Rules
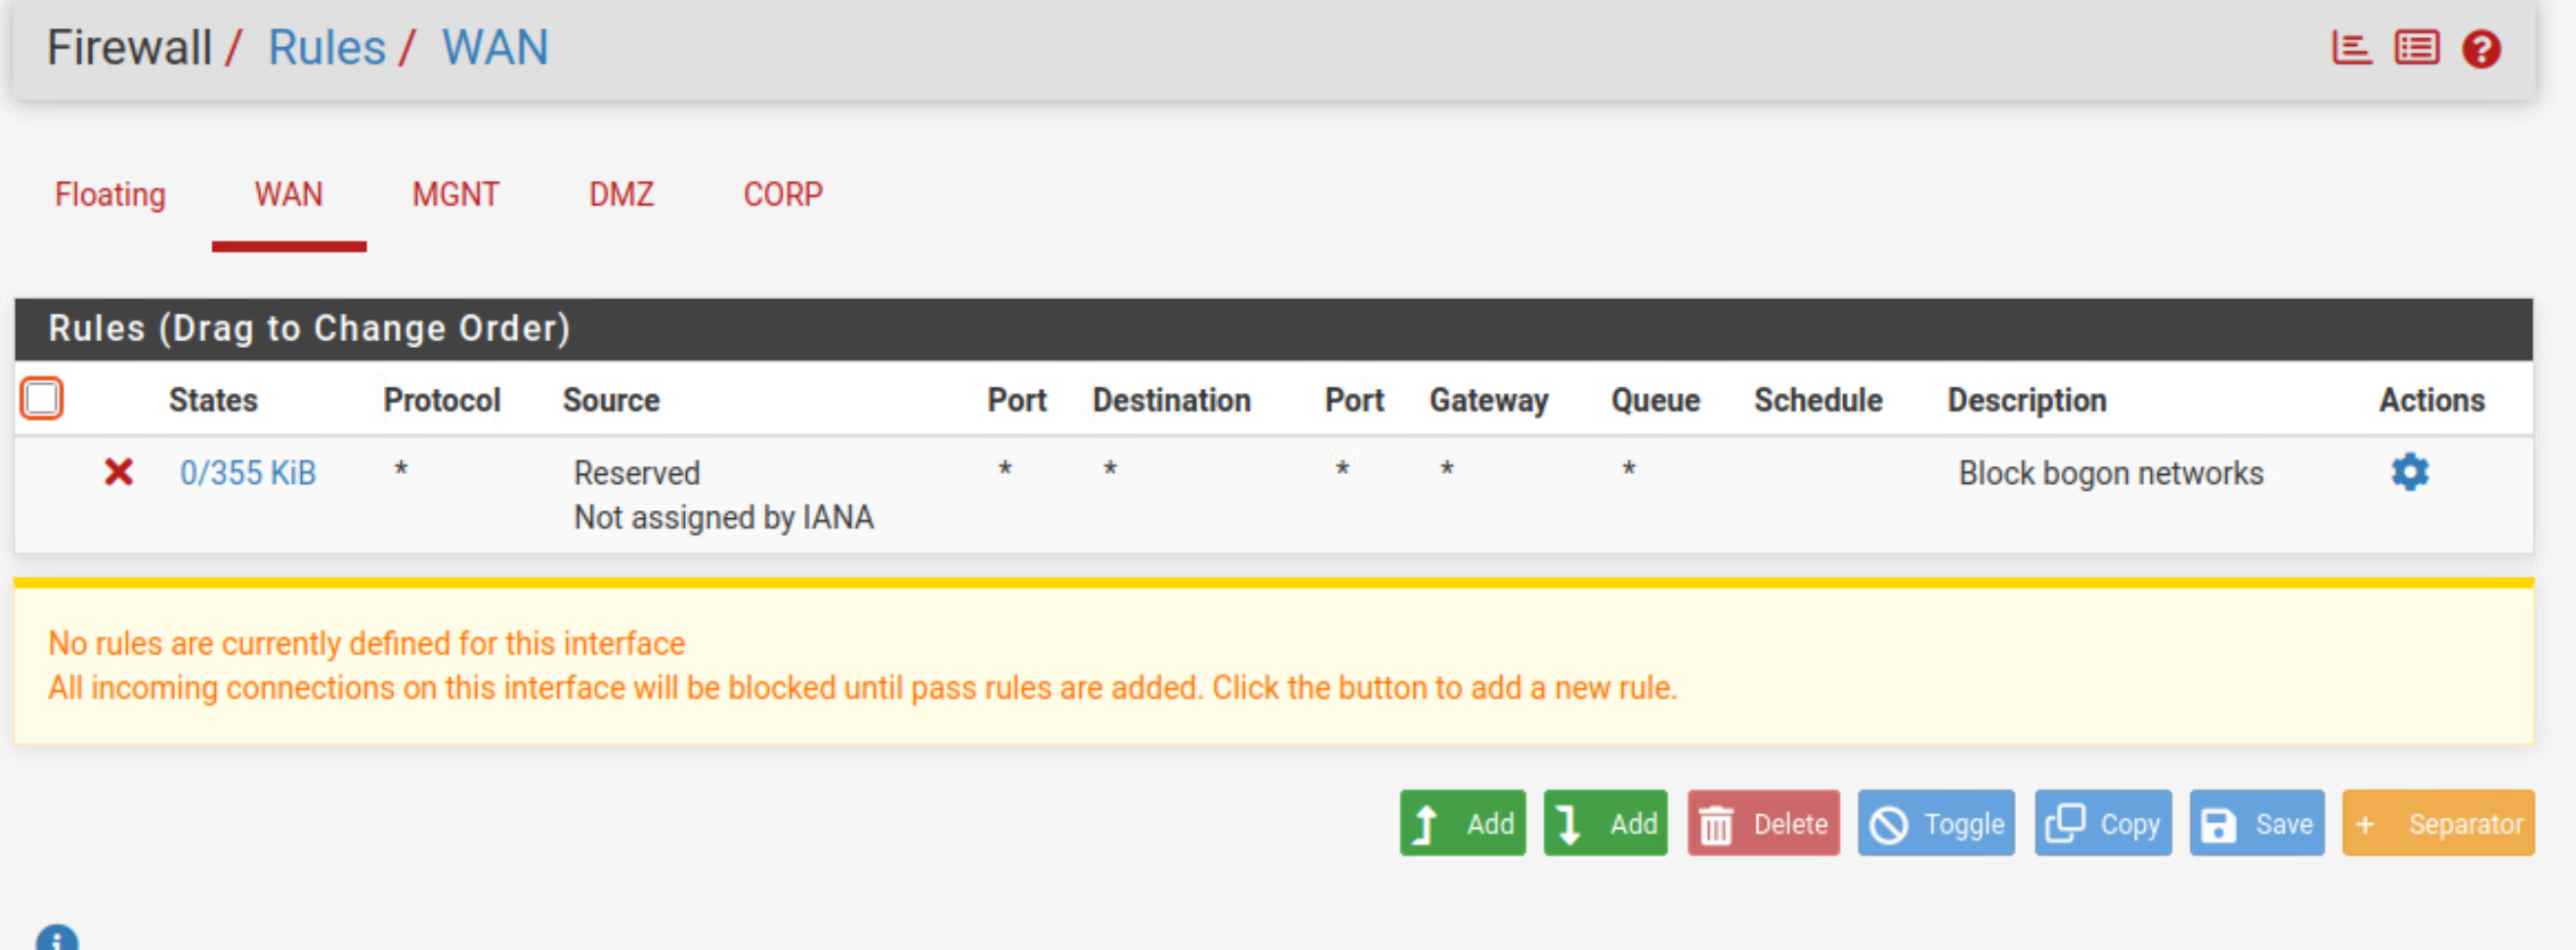
… WAN Rules:
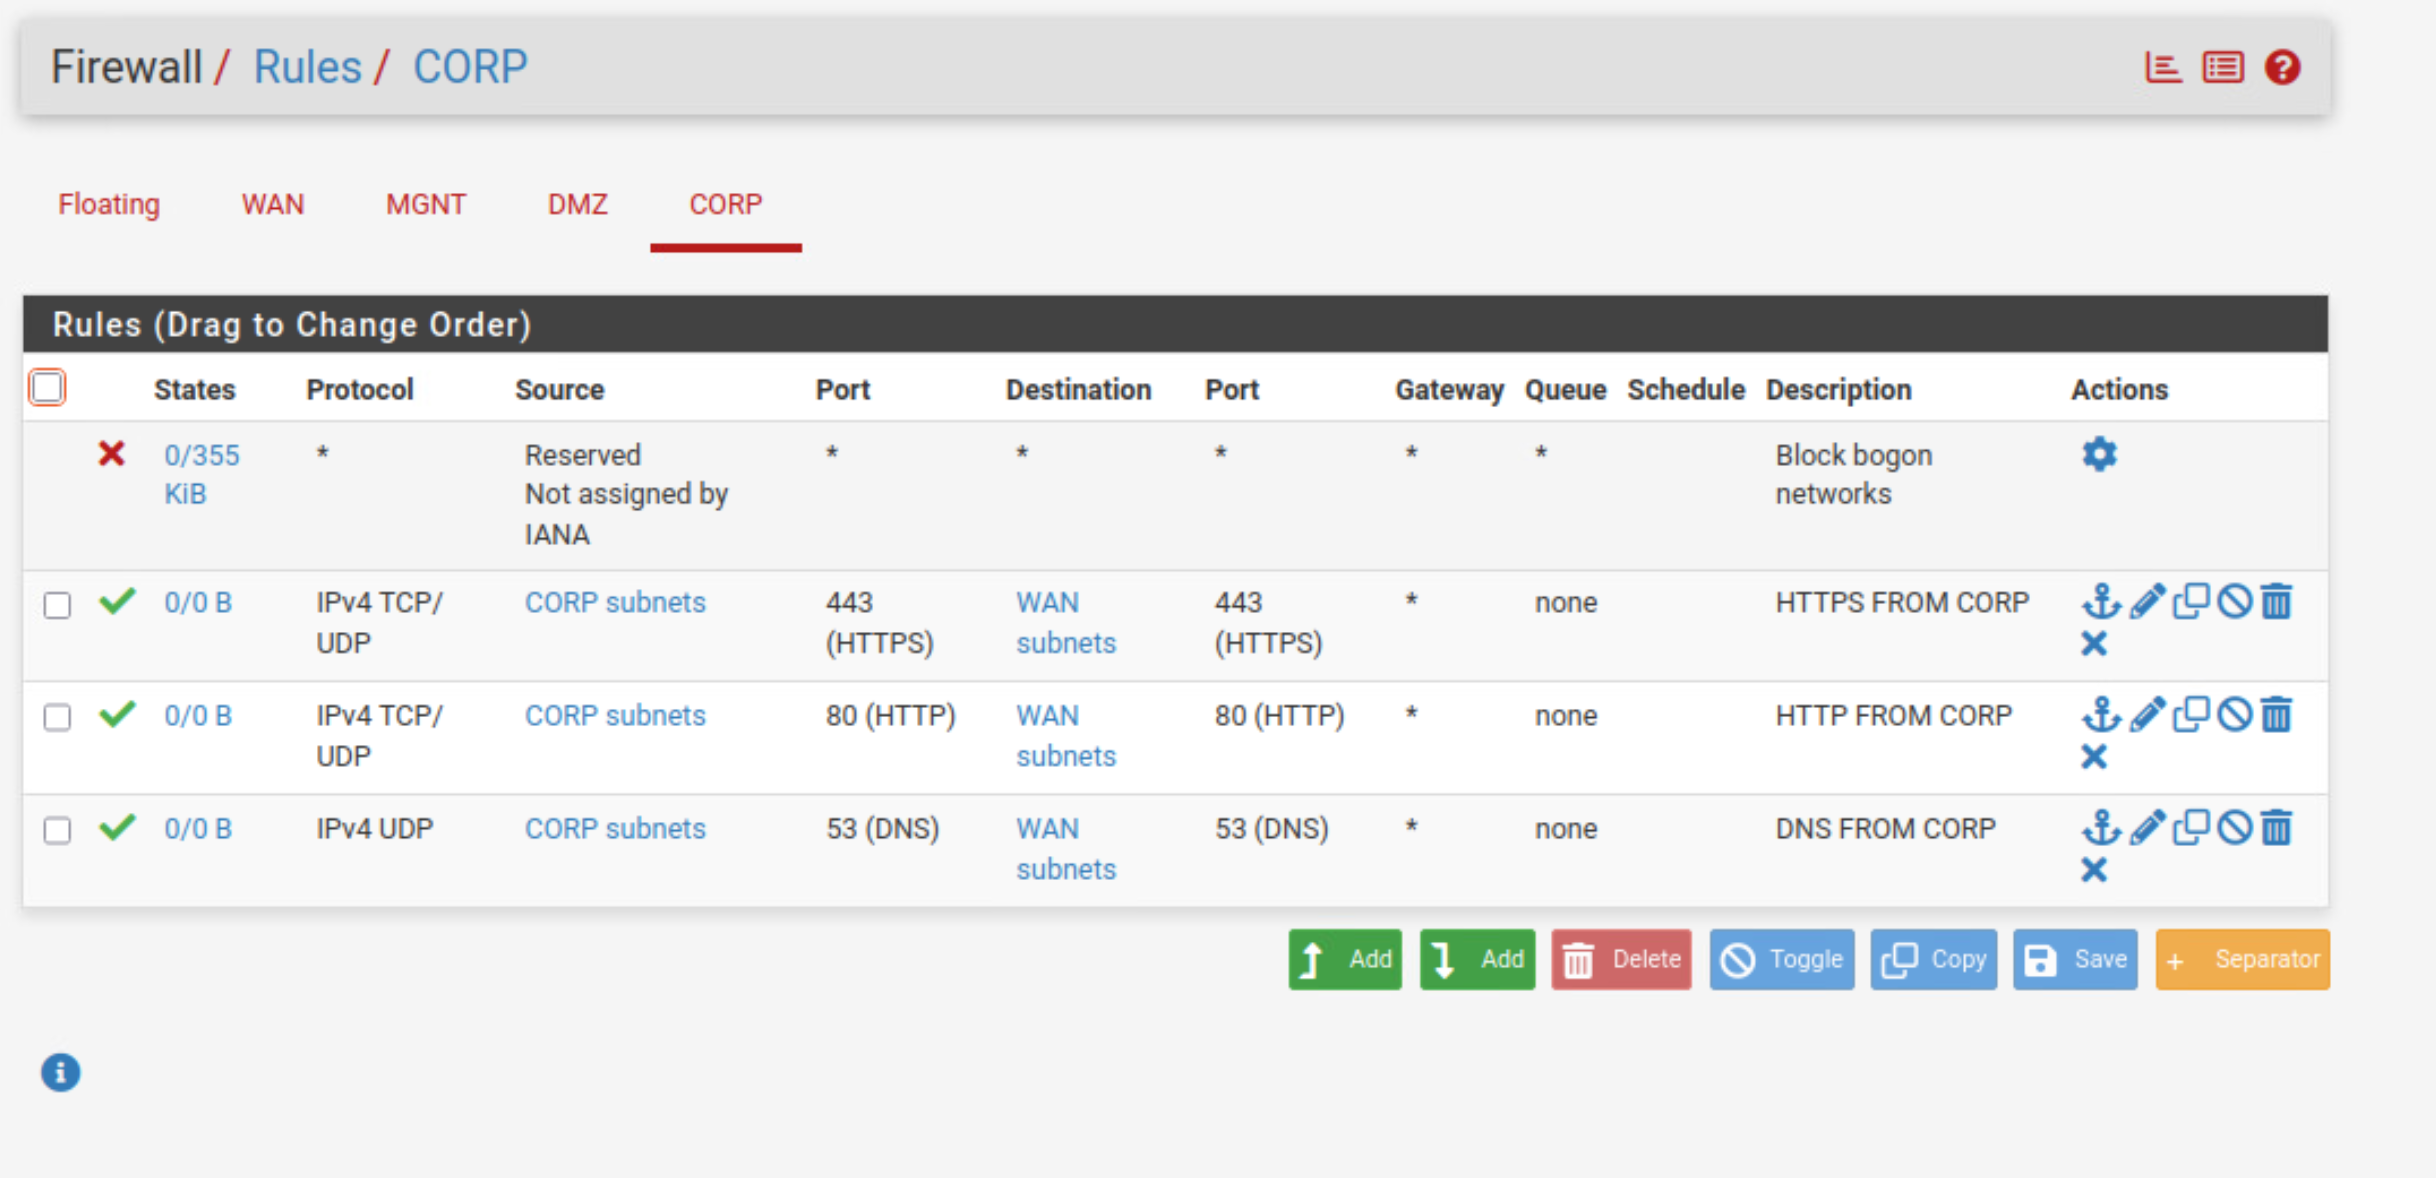
CORP Rules:
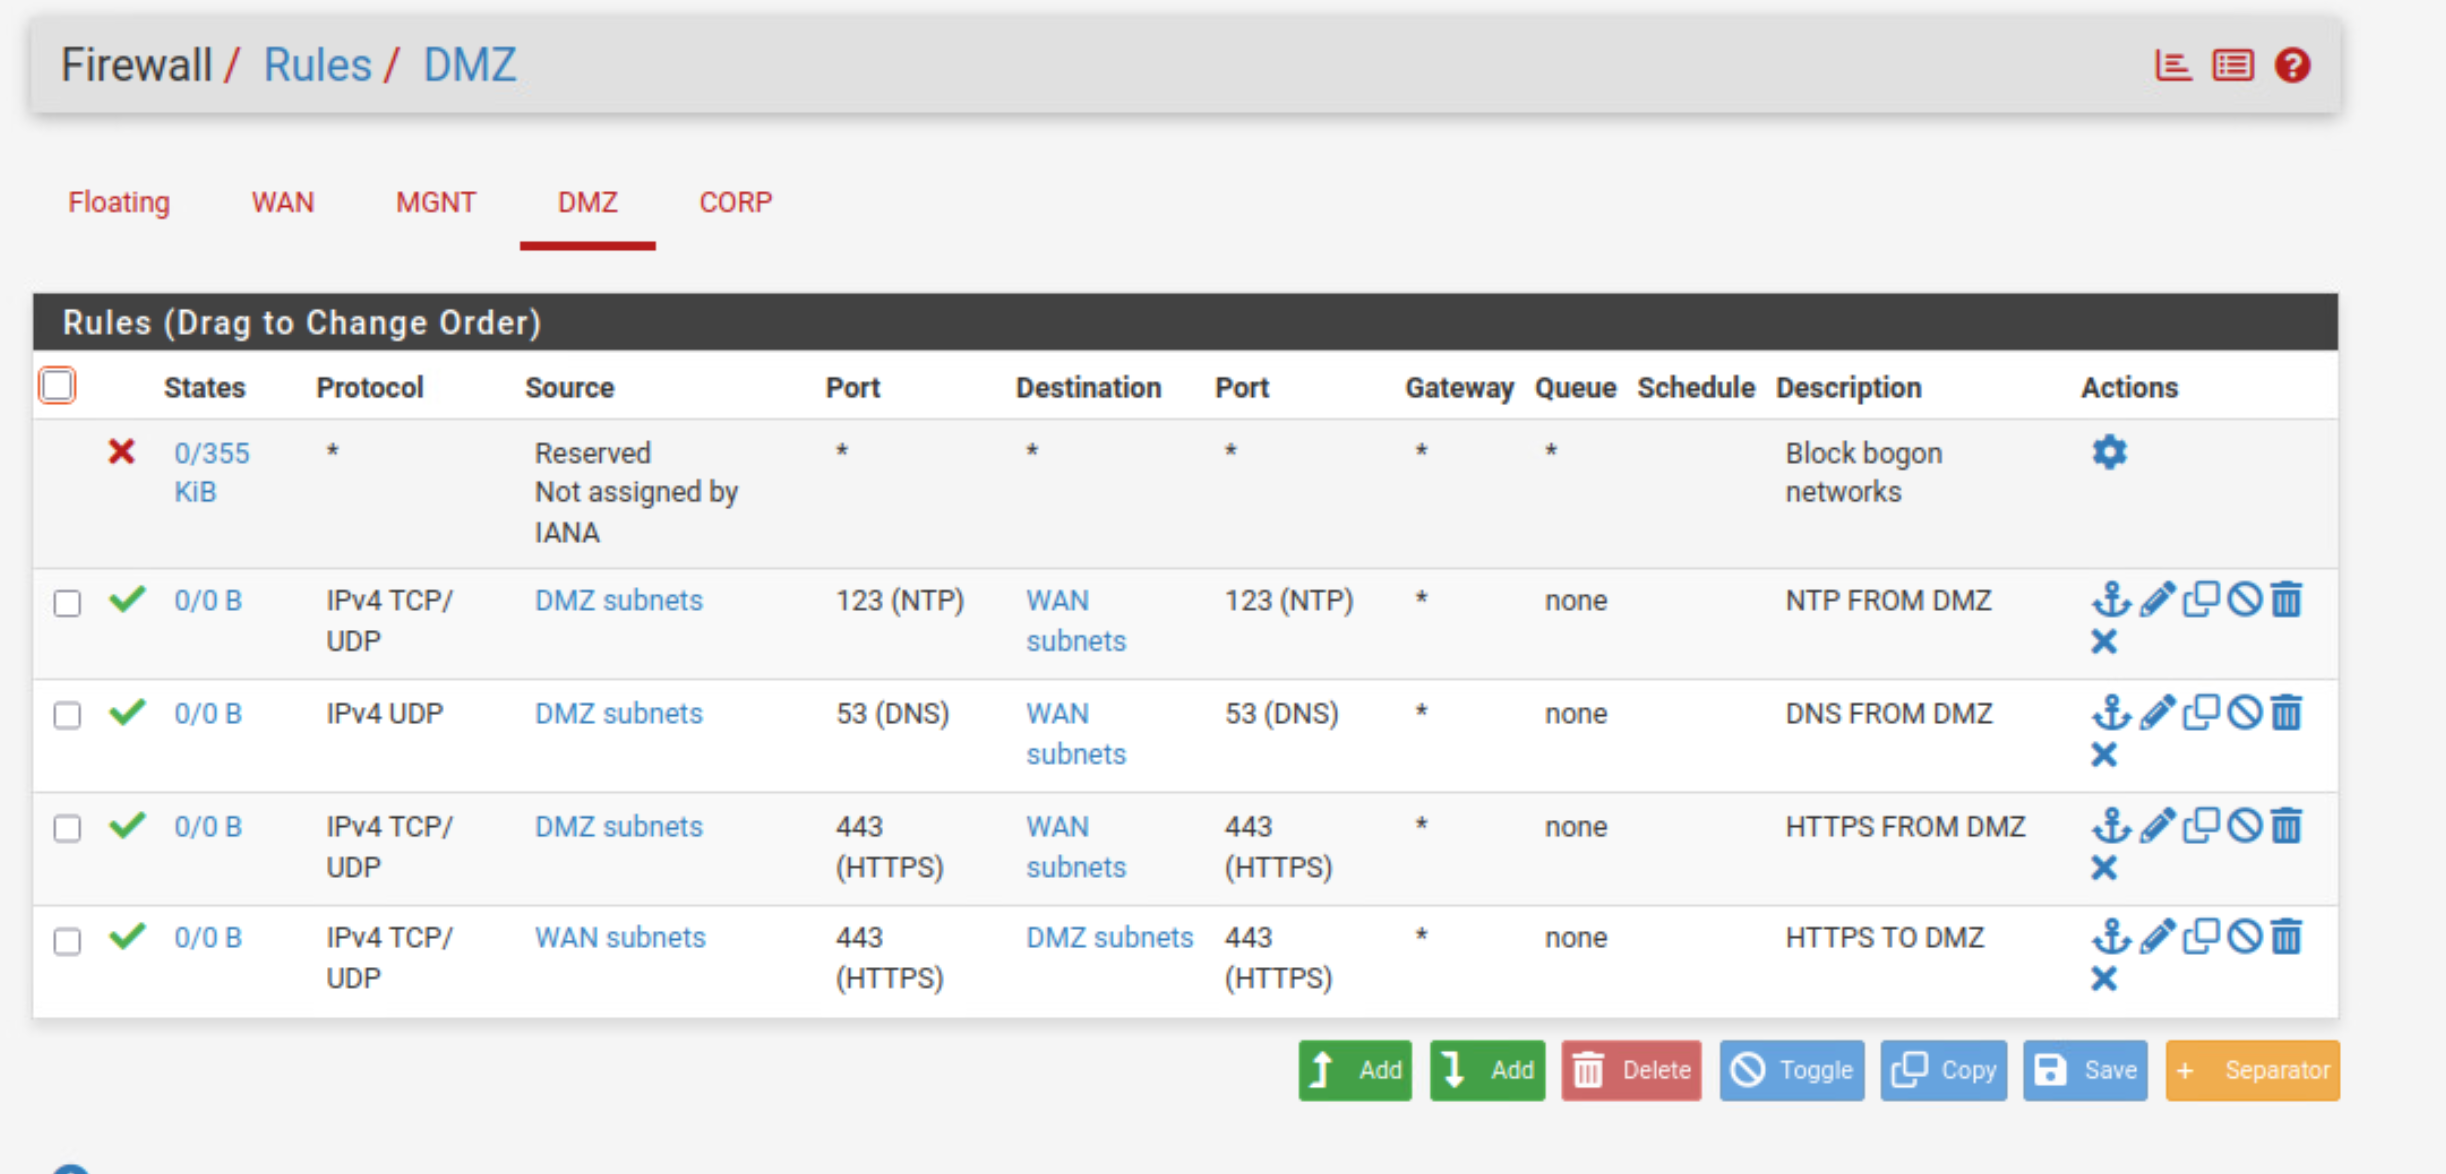
DMZ Rules:
MGMT Rules:
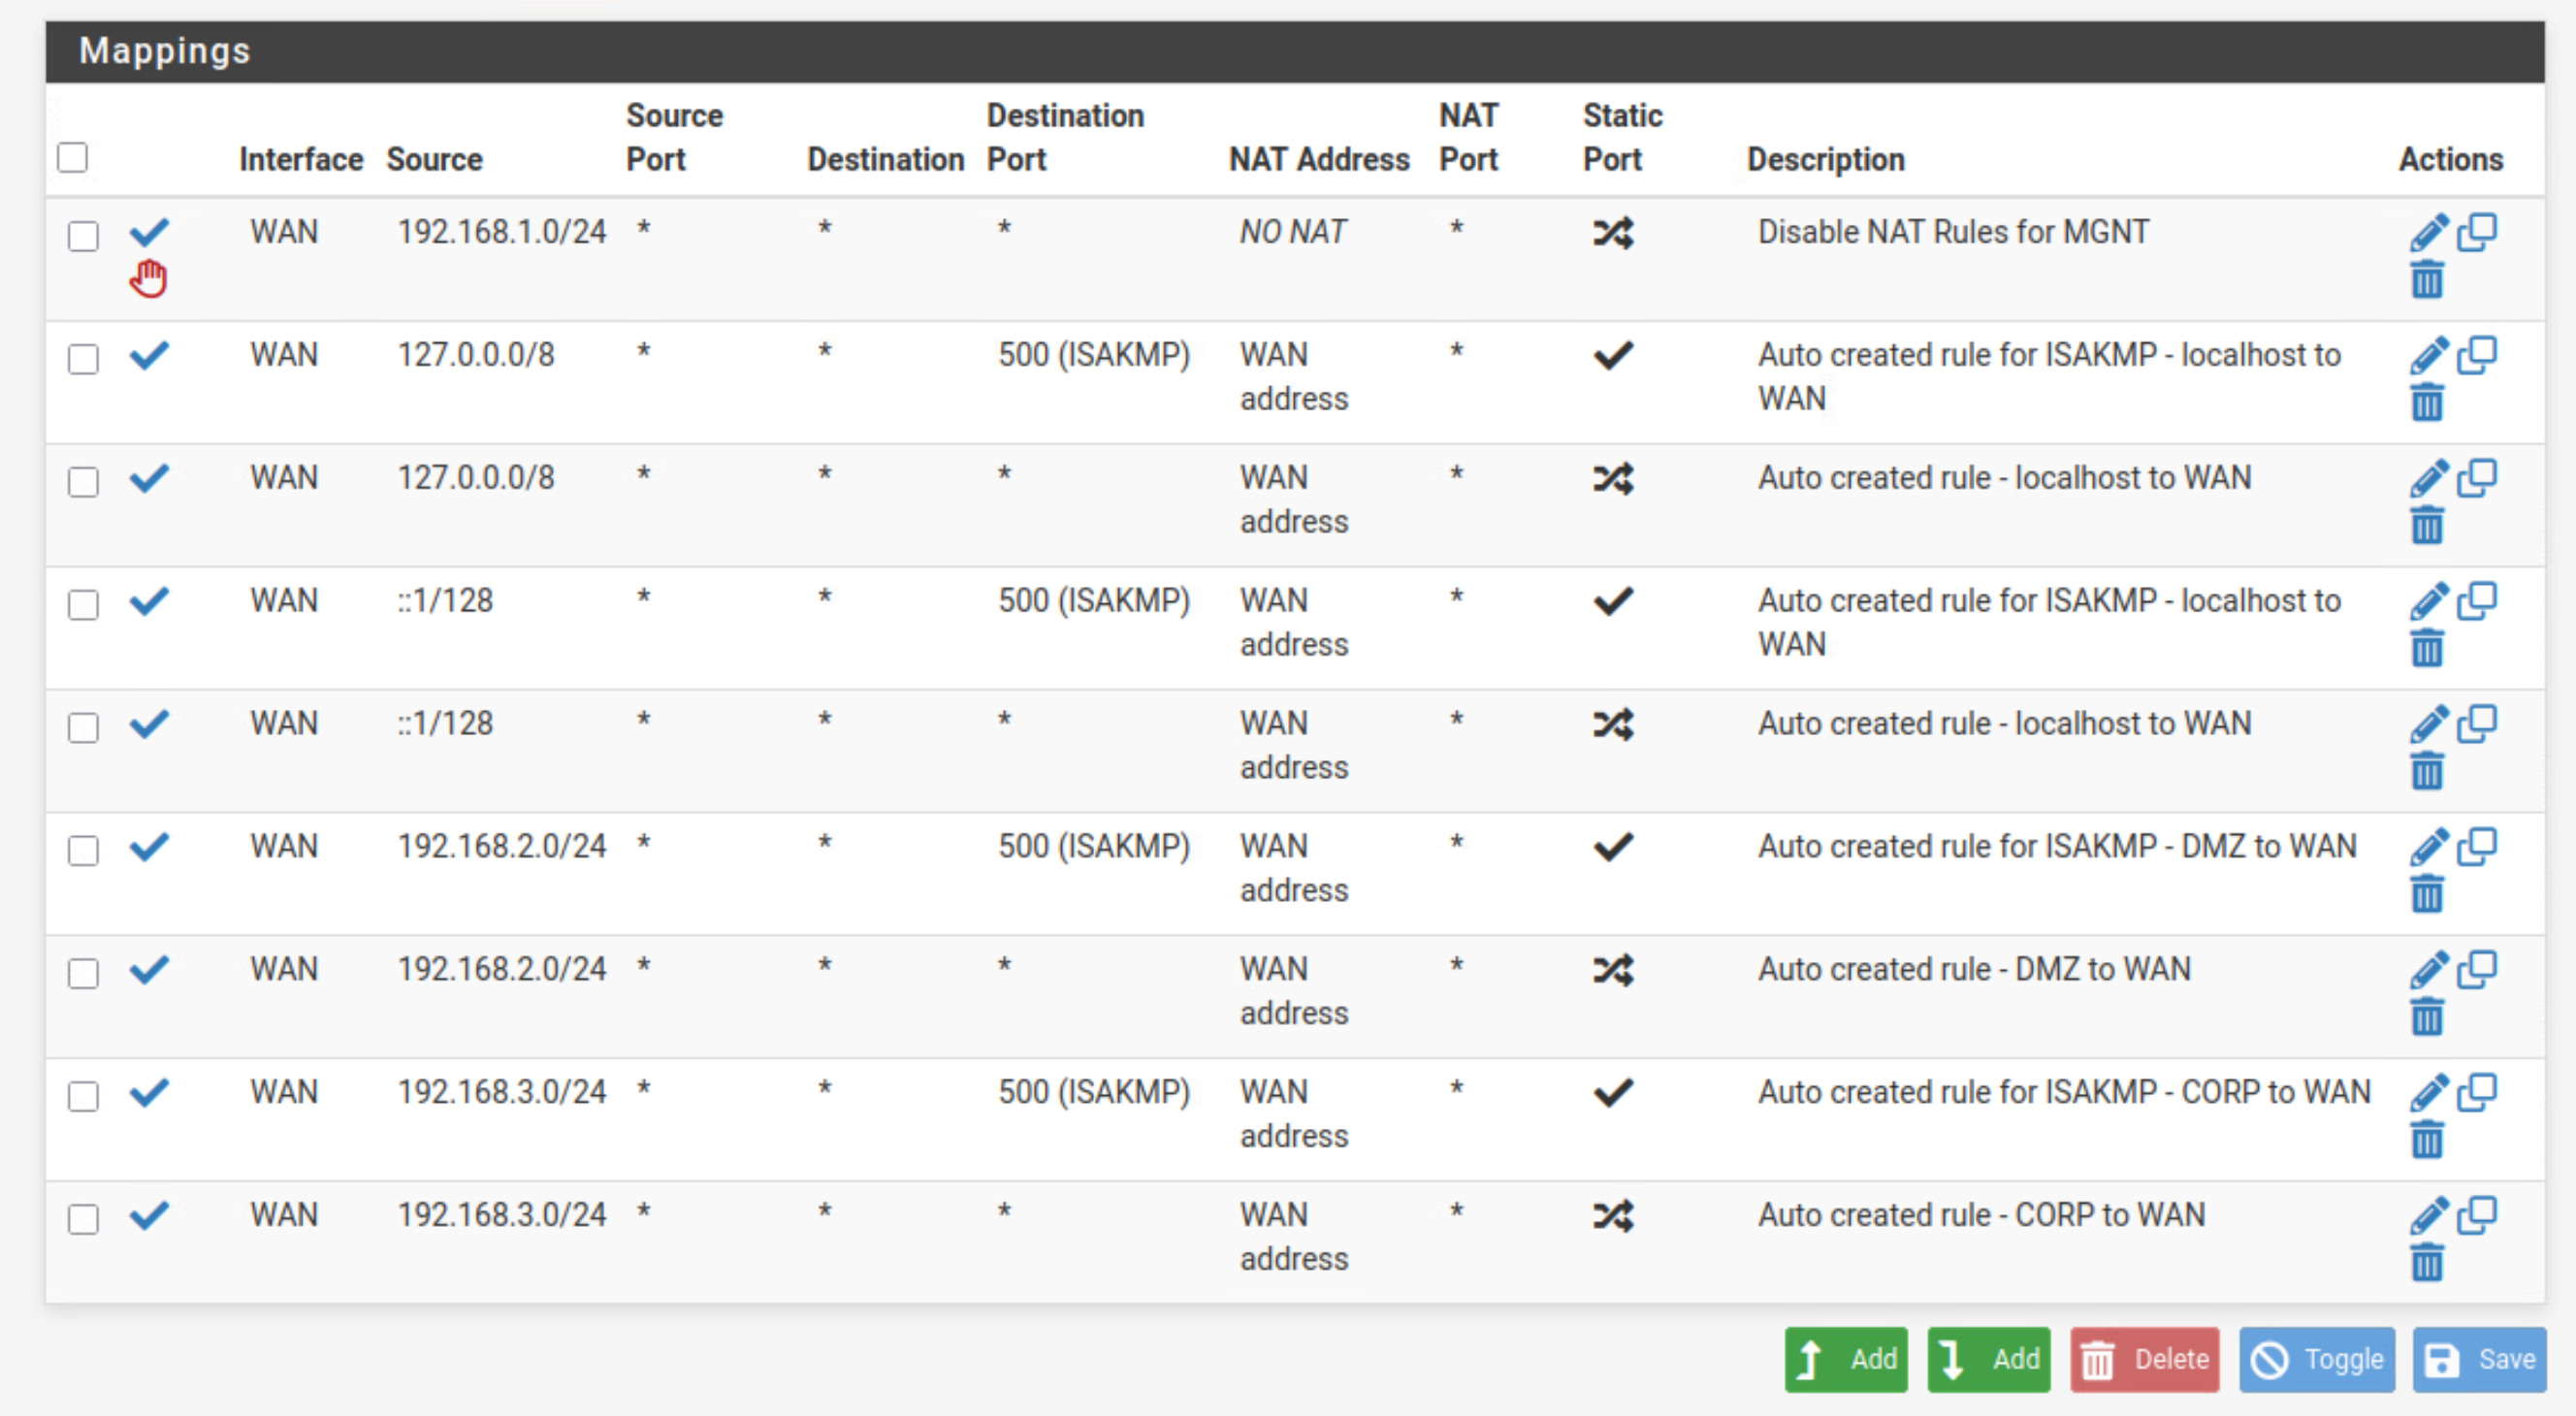
NAT Rules
Part 3: Splunk Installation
With the network foundation built, the next step was setting up our SIEM. I installed this on an Ubuntu VM with the static IP of 192.168.1.100 (on the MGMT network).
The installation process is very straightforward. I followed this excellent step-by-step guide:
| Guide: [Installing Splunk Enterprise on Ubuntu: Step-by-Step Guide | by Daniel Opara | Medium](https://medium.com/@daniel.opara/installing-splunk-enterprise-on-ubuntu-step-by-step-guide-8d1b168a306) |
After installation, the next step (which I’ll detail later) is to configure the Splunk Universal Forwarder.
What’s Next
That’s all for this technical breakdown! With the network configured and our SIEM online, the lab is truly ready.
The next phase, as mentioned last week, is to begin deploying the AI/LLM components into the DMZ. Stay tuned!